Creator: Cross-filtering charts
With just a few clicks, you can configure any chart or table to update a dashboard filter.
Creator allows you to customise what happens when you click on a chart in a dashboard. This article will walk you through cross-filtering - namely how to set up cards to update filters on a dashboard.
Here’s the dashboard we’re going to wire up:
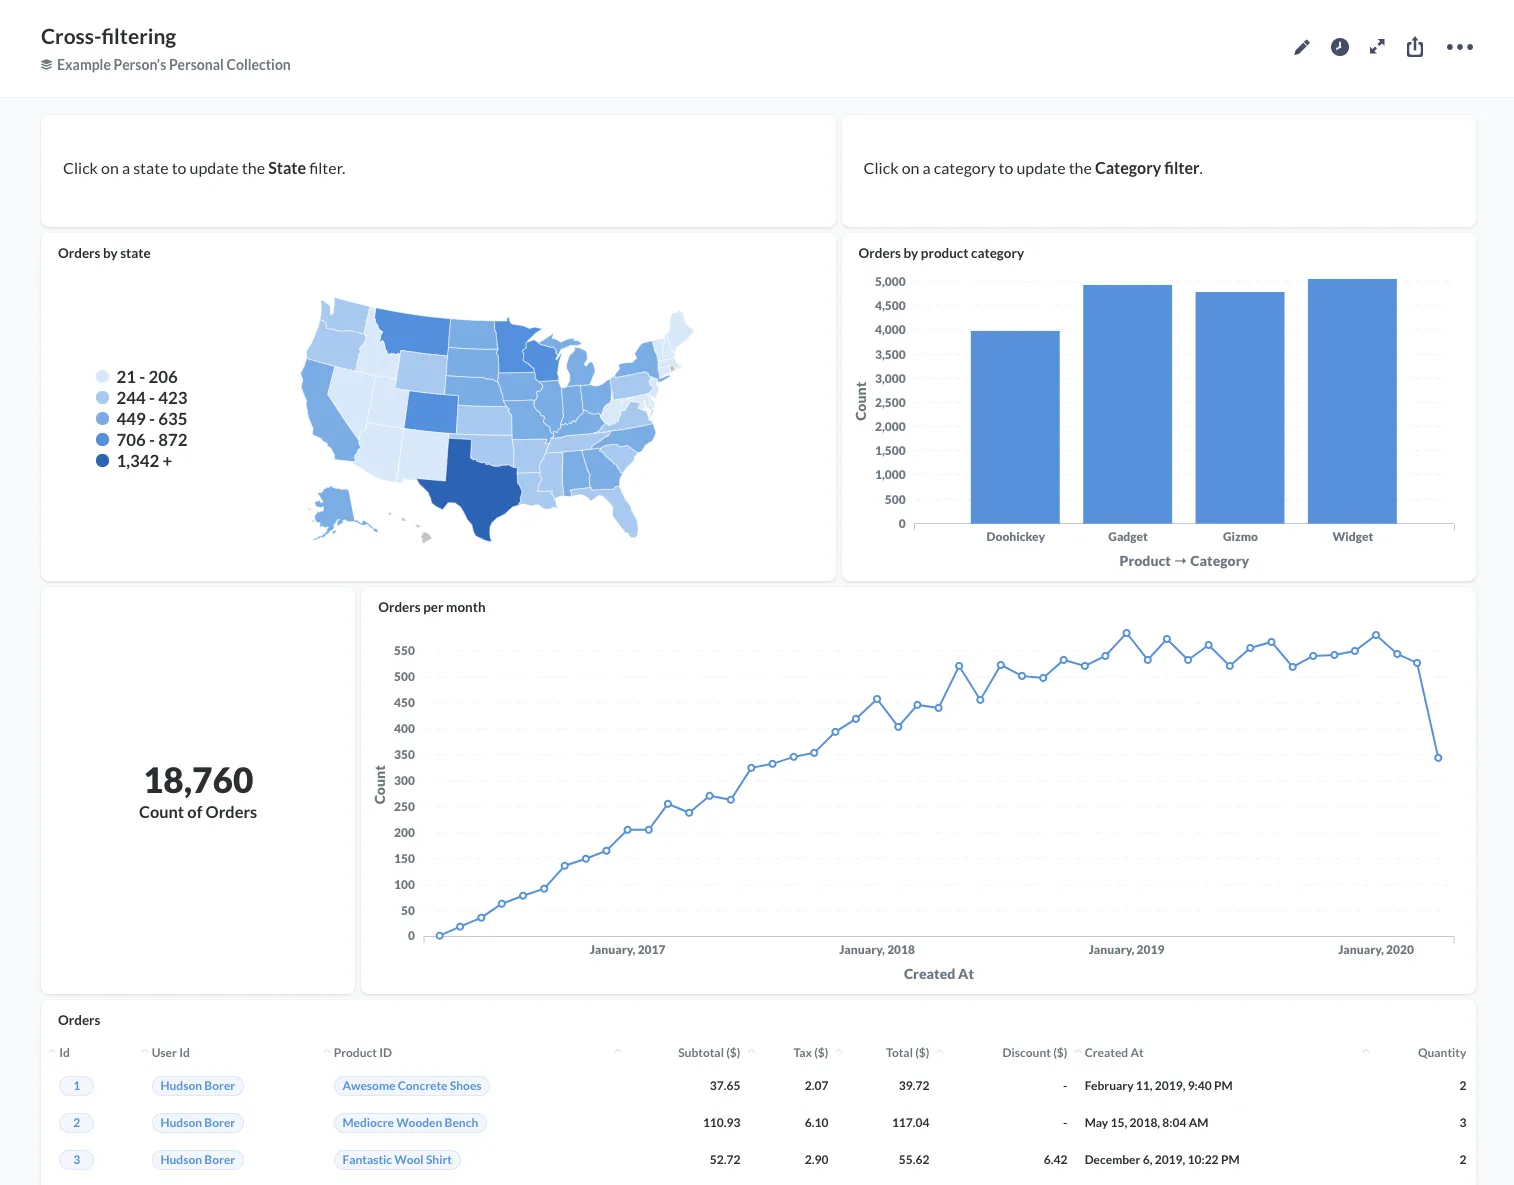
Here’s our goal: we want to set up this dashboard so that when people click on a state in the map, the dashboard’s State filter updates and filters every other card except the Orders by State card.
We also want to wire up the dashboard so that when people click on a category in the bar chart, the category filter updates, and all the cards except the Orders by Product Category card update to filter orders by that category.
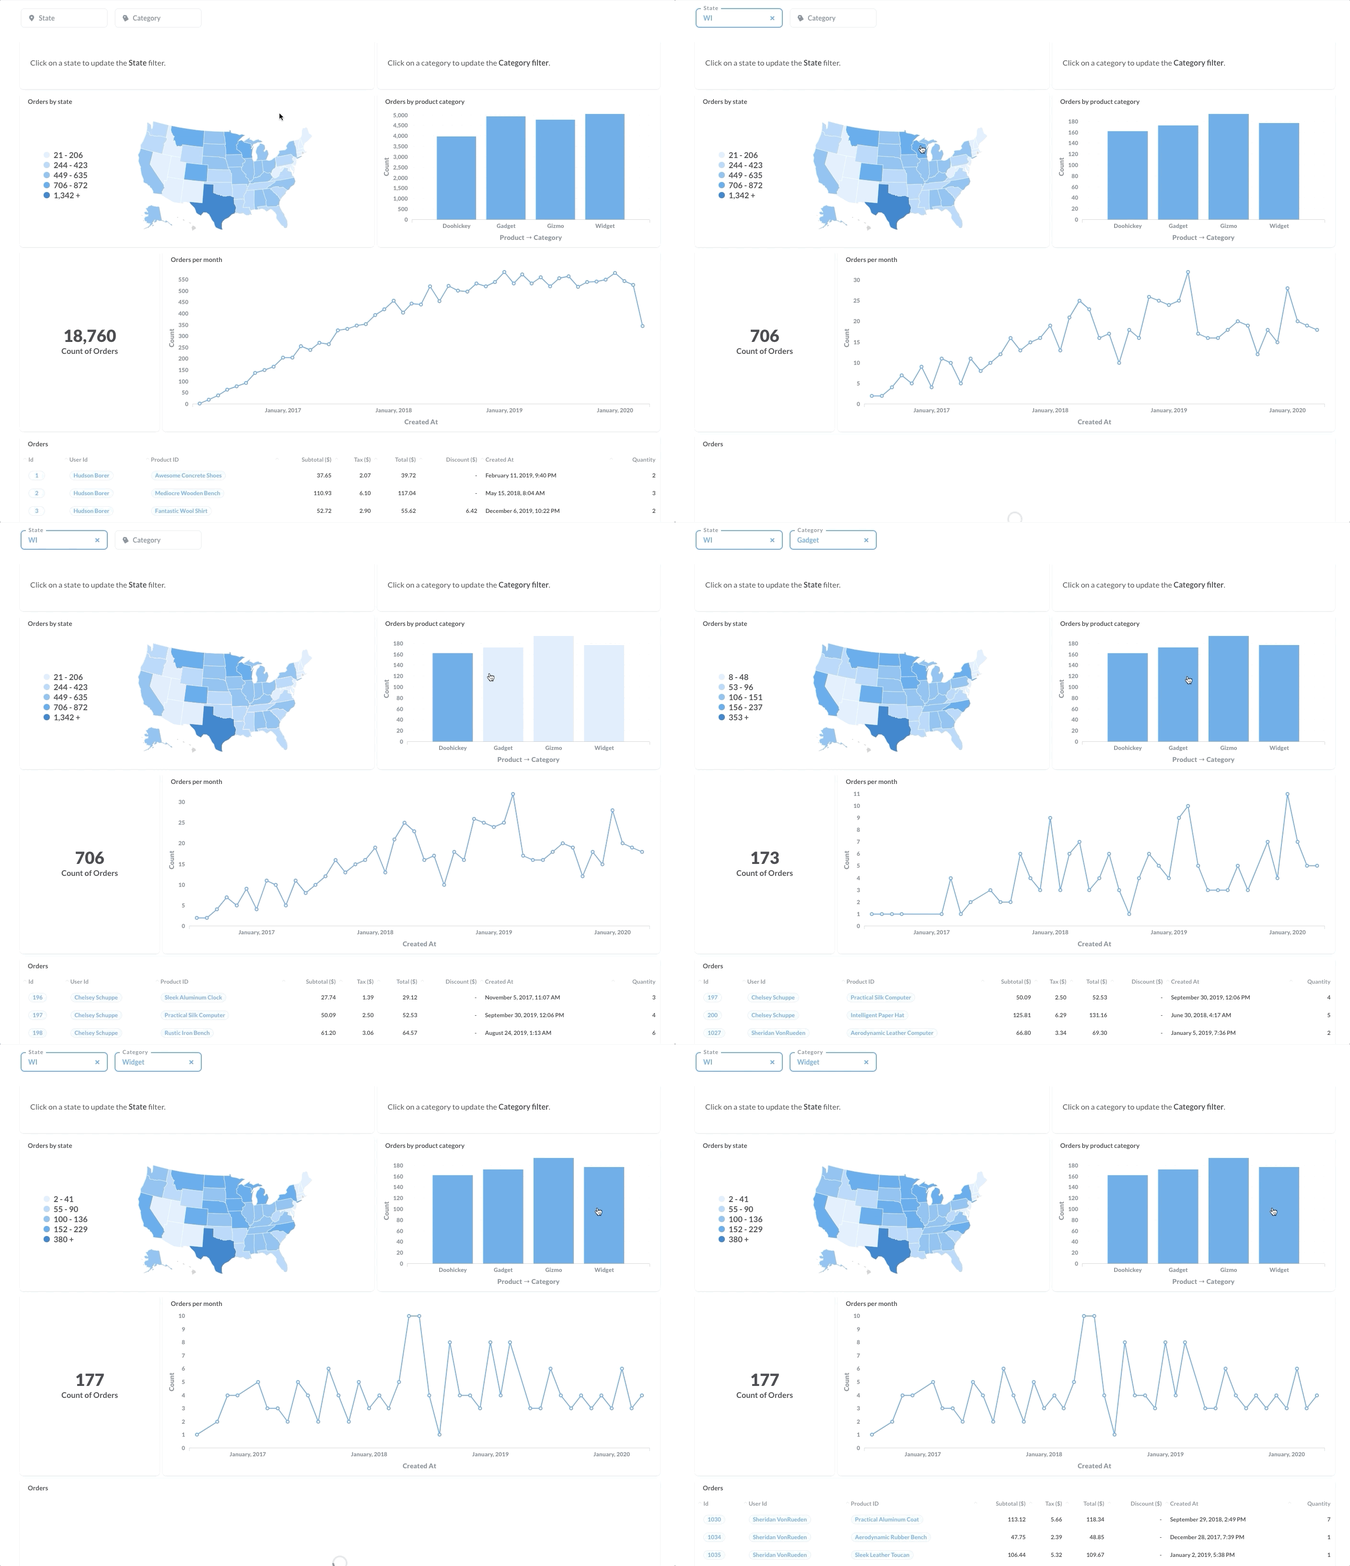
Here’s the finished dashboard in action:
➡️ Setting up the filters
You've probably already got questions on your dashboard, so we’ll start by adding two filters: a State filter and a Category filter. The setup process for both filters is similar, so we’ll focus on adding the State filter and you’ll get the idea.
From the dashboard, we’ll click on the pencil icon to enter dashboard editing mode. To add a state filter, we’ll select the filter icon from the menu on the top right. For filter type, we’ll select Location, and for kind, we’ll select State.

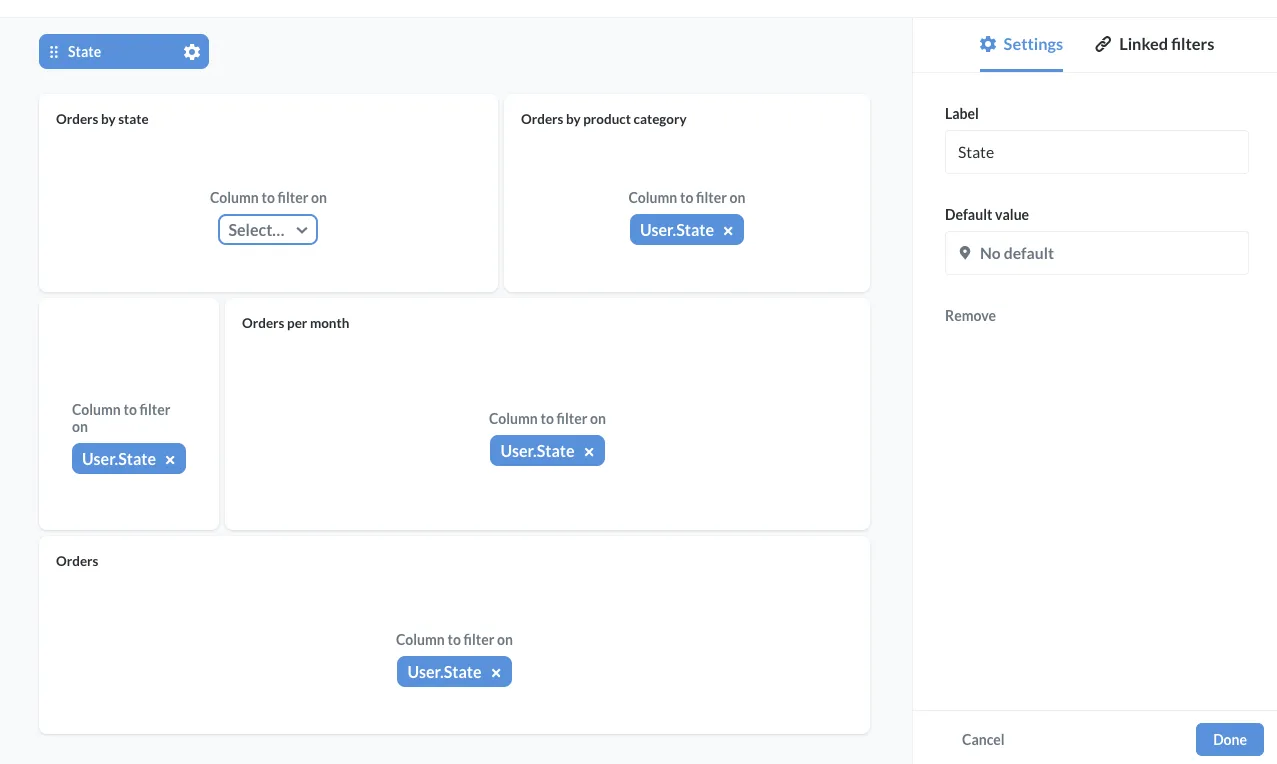
Next, we’ll want to wire up every card to our state filter except the card we want to use to update that filter: the Orders by state card. This way, we can click on different states, and the other cards will update to show orders from users in the clicked state.
To set up this cross-filtering, let’s set every other card’s Column to filter on to User.State.
Next, we’ll want to set up the map of the United States to update the state filter on click. To do that, we’ll need to change the click behavior for our Orders by State question. Hover over the Orders by State card and click on the click behaviour icon:
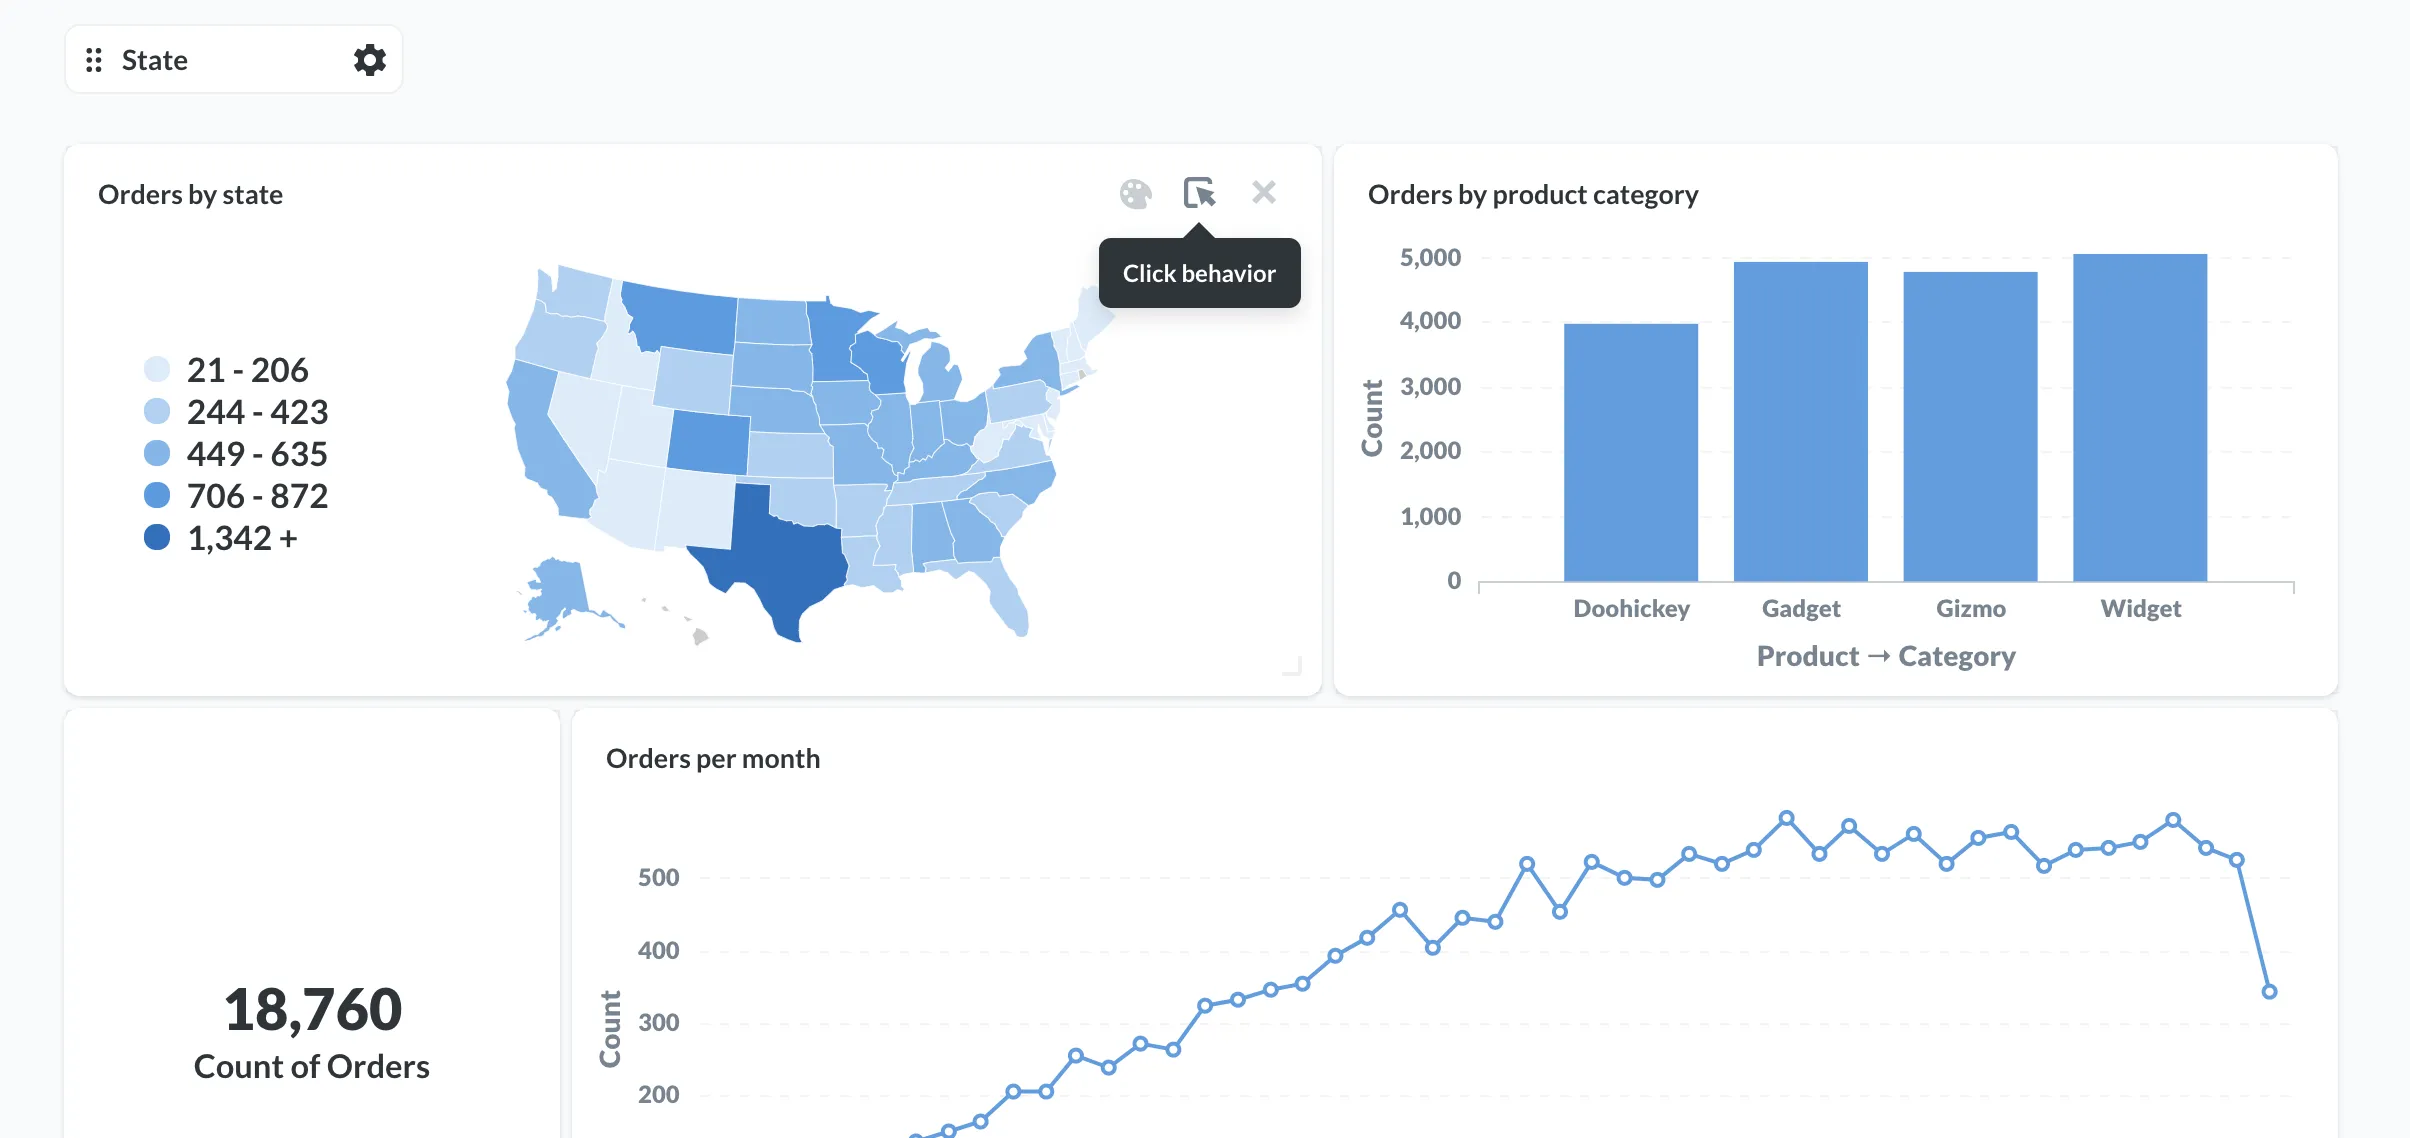
Creator will slide out a click behaviour sidebar where we can define what happens when people click on the Orders by State card. Since we want the card to update the State filter, we’ll select the Update a dashboard filter option.
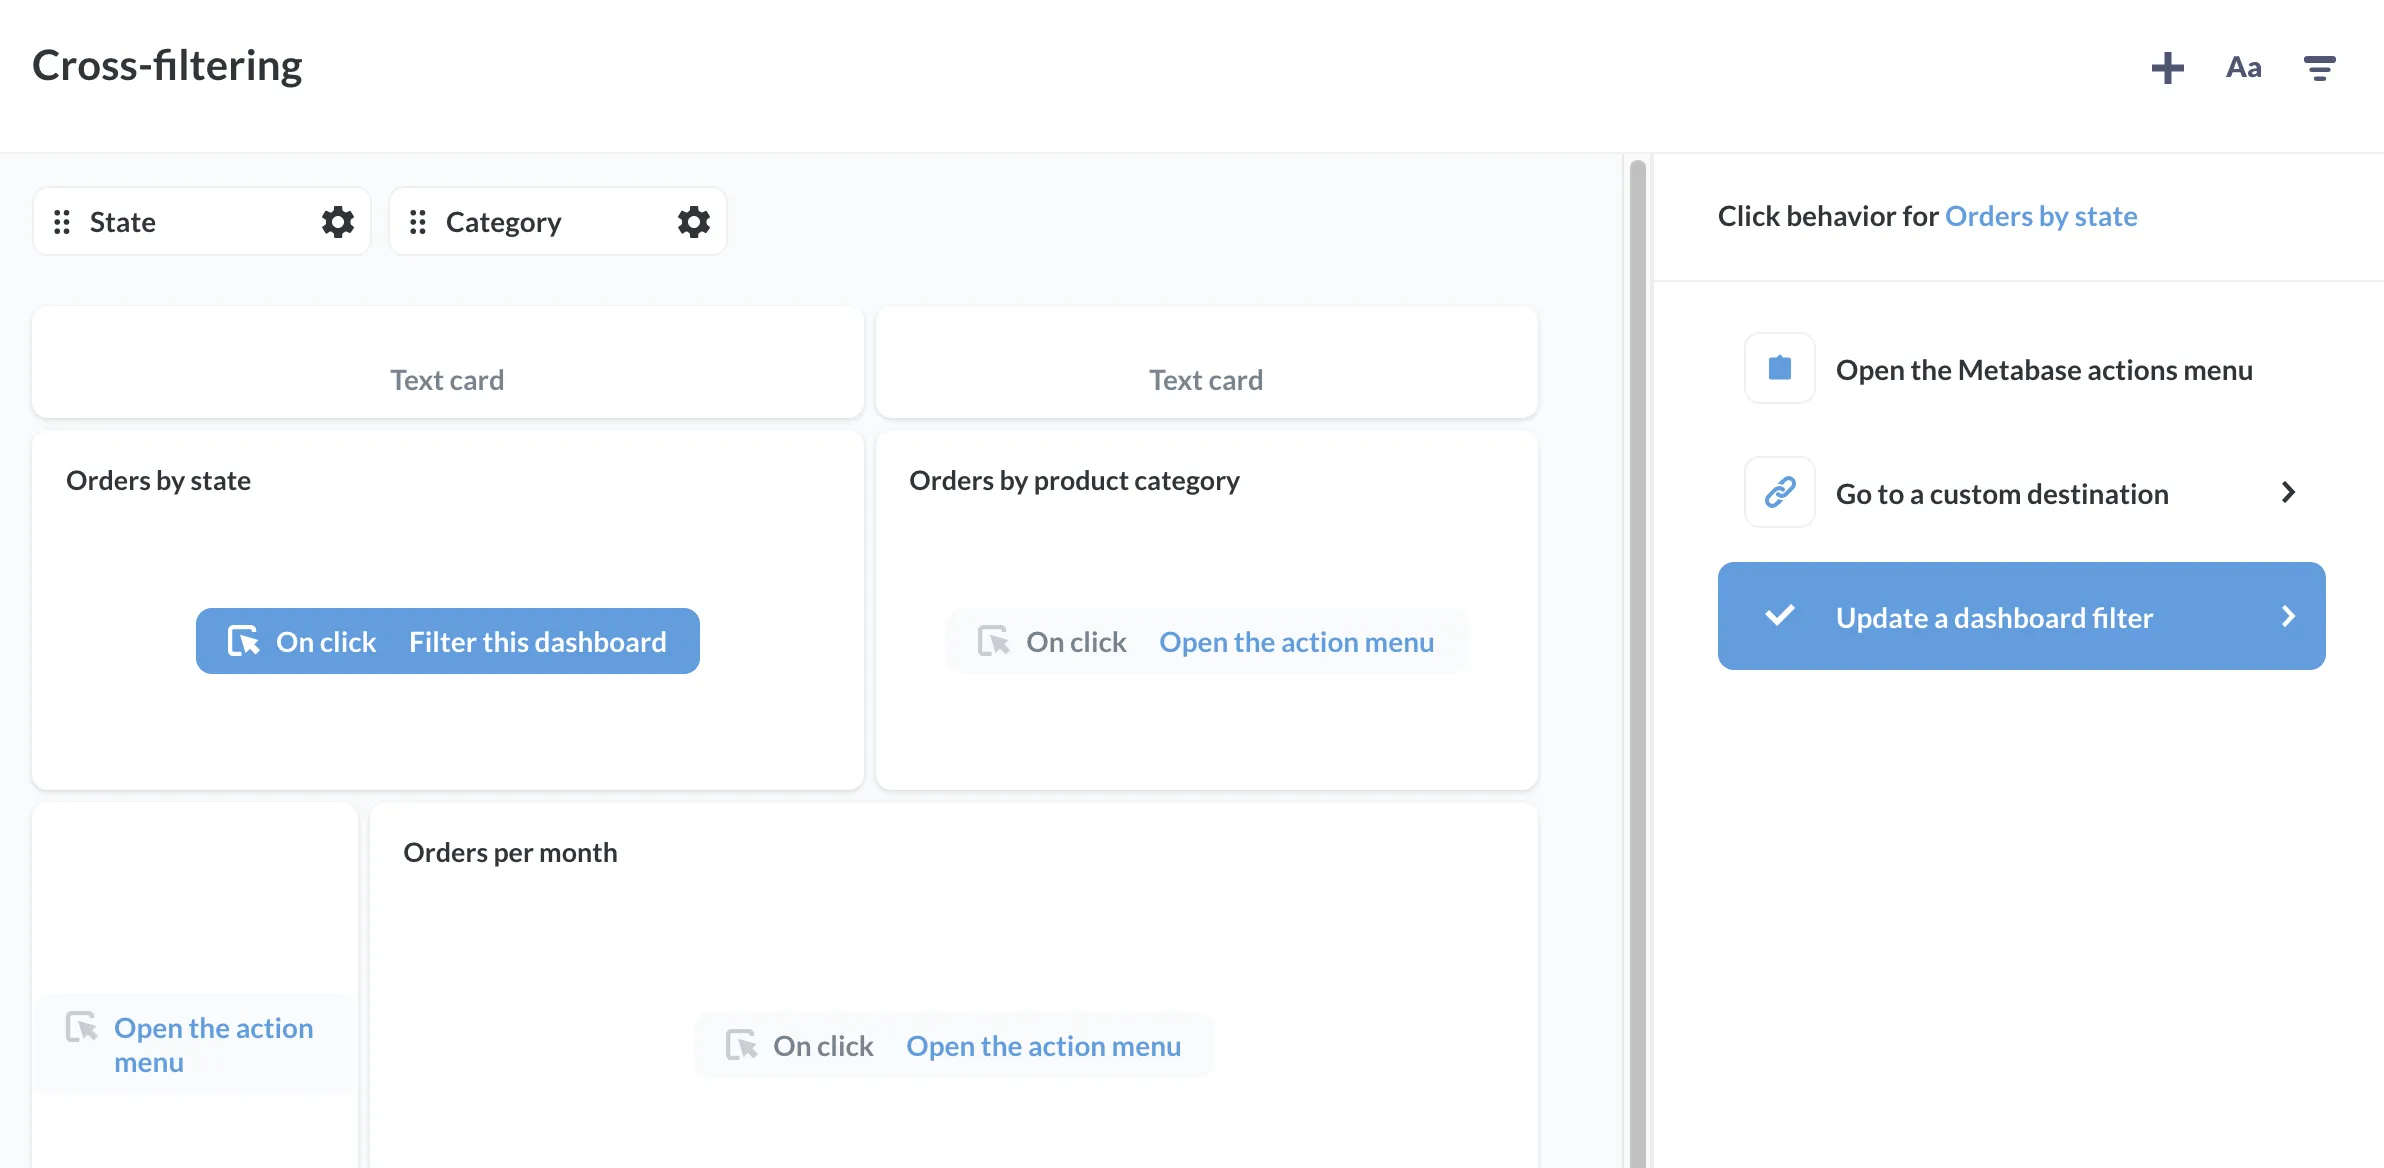
Creator will list the dashboard’s available filters that we can update:
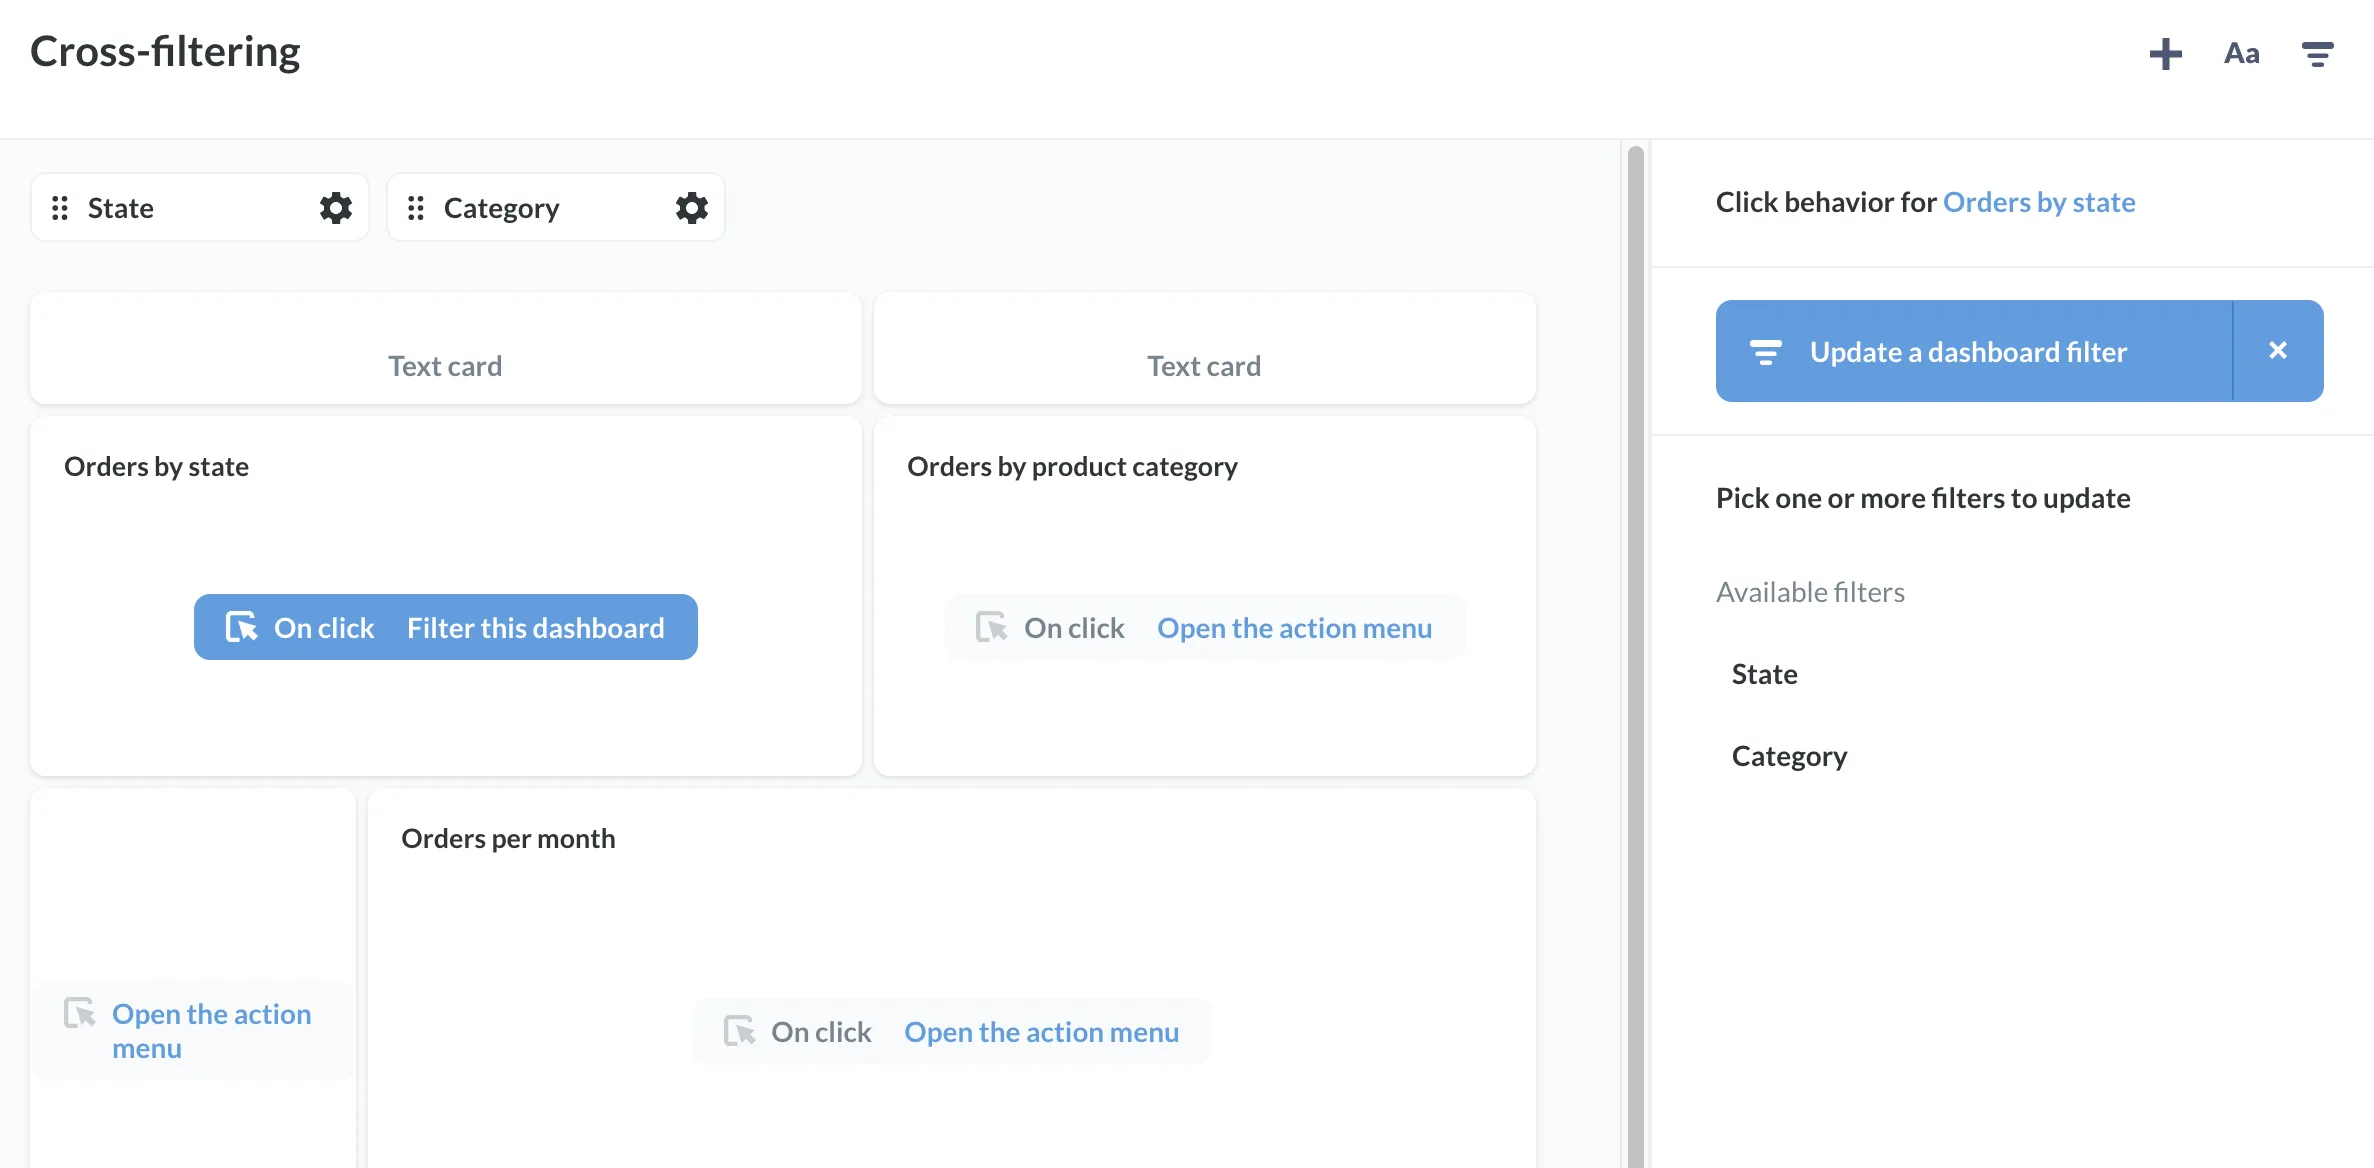
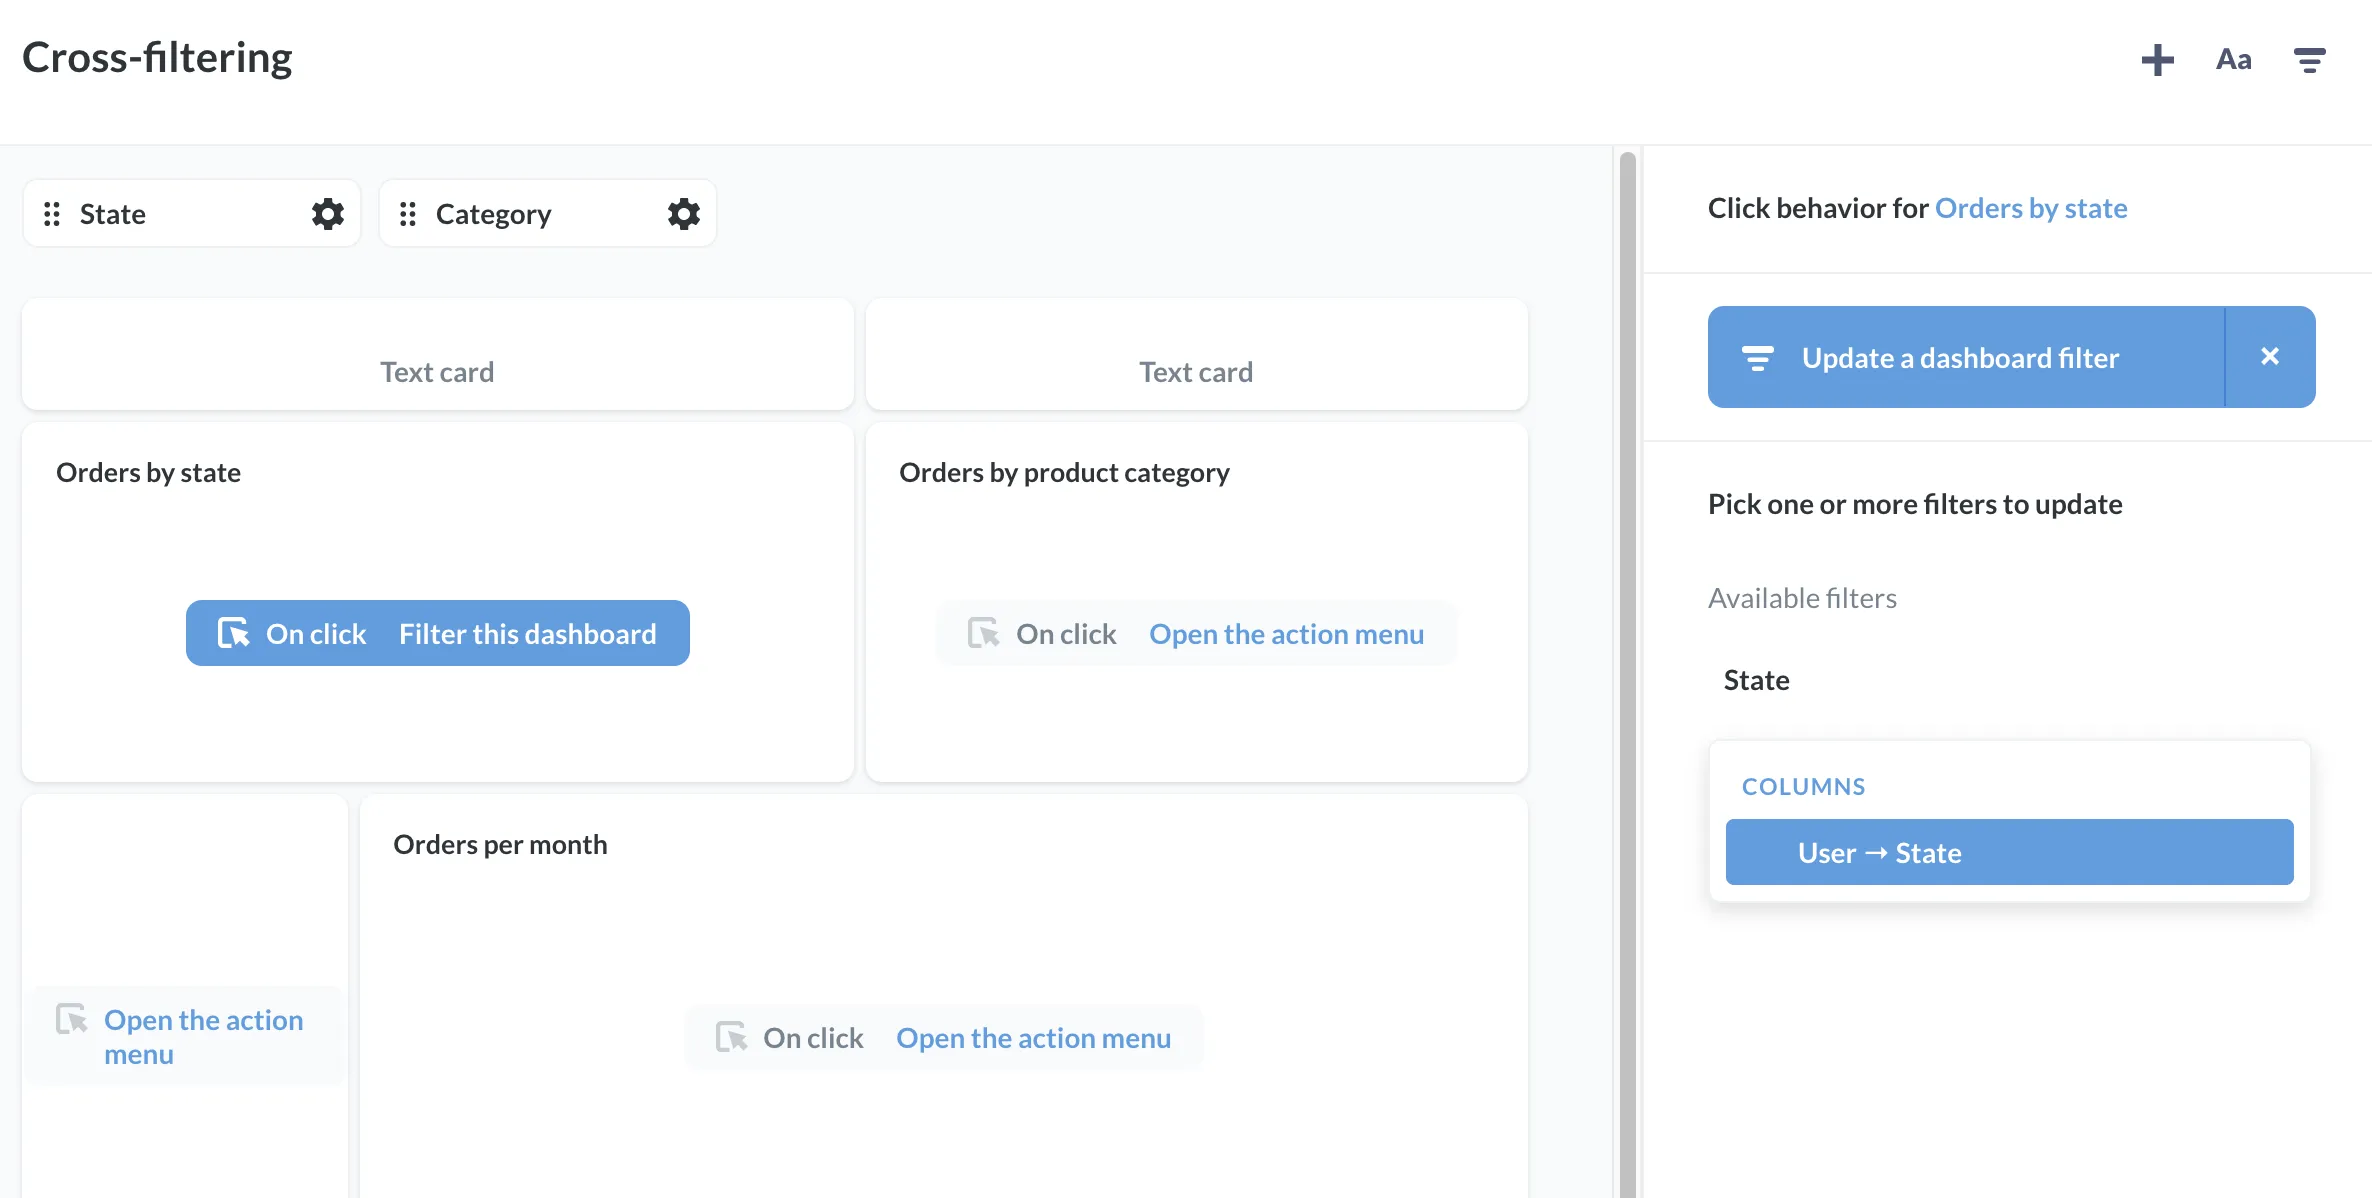
Since we want to update the State filter, we’ll select the State filter, and pass the value of User→State to the filter.
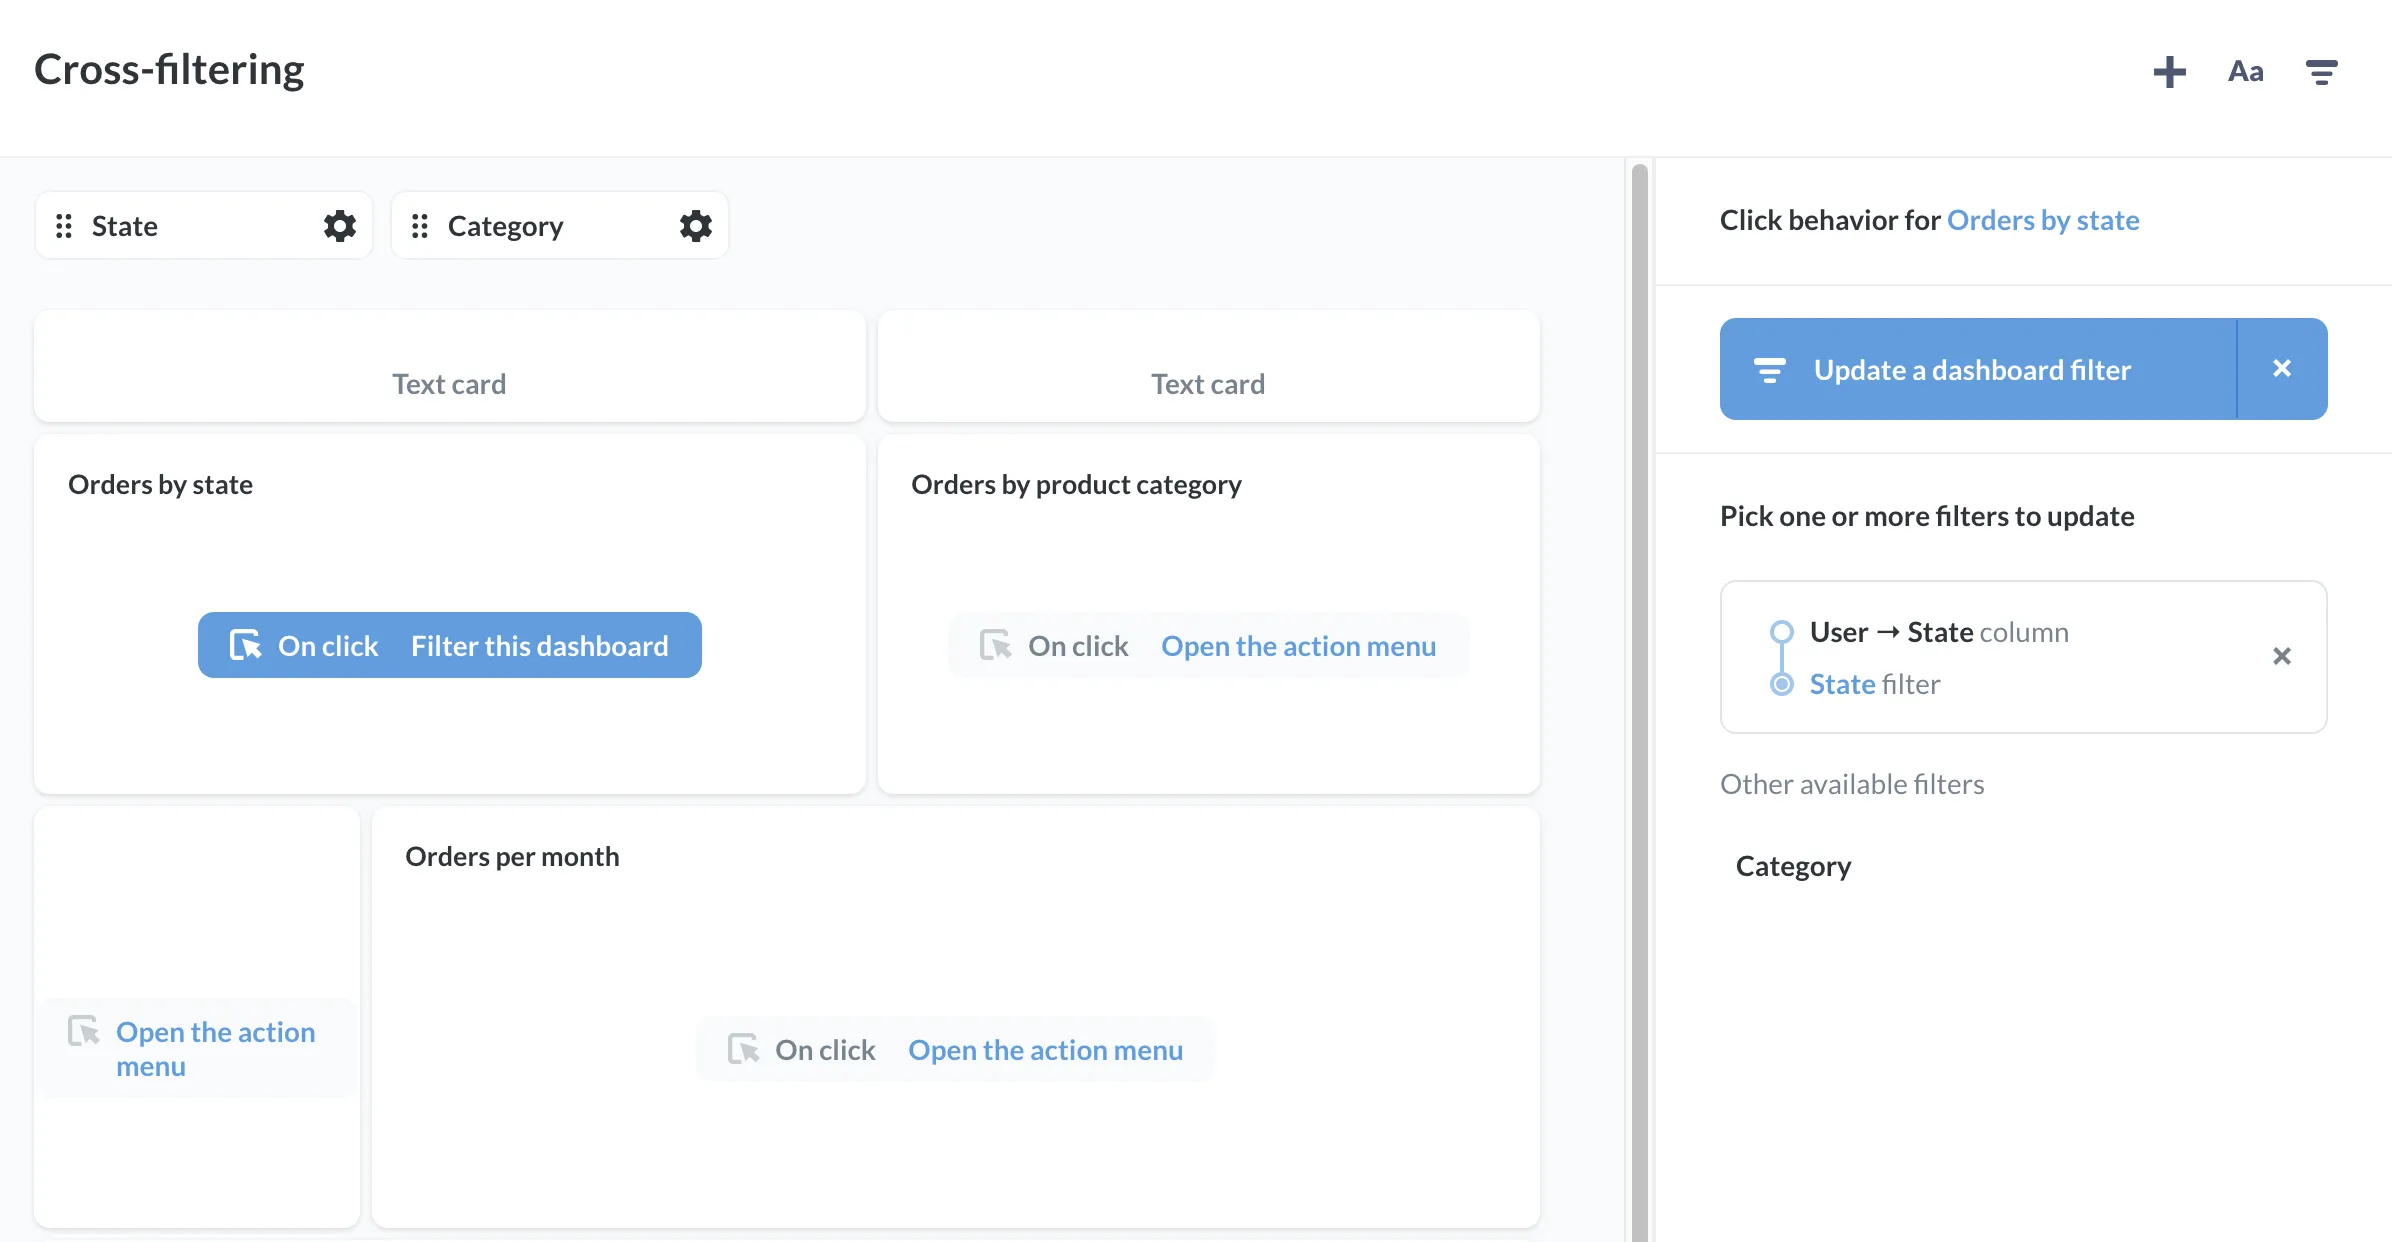
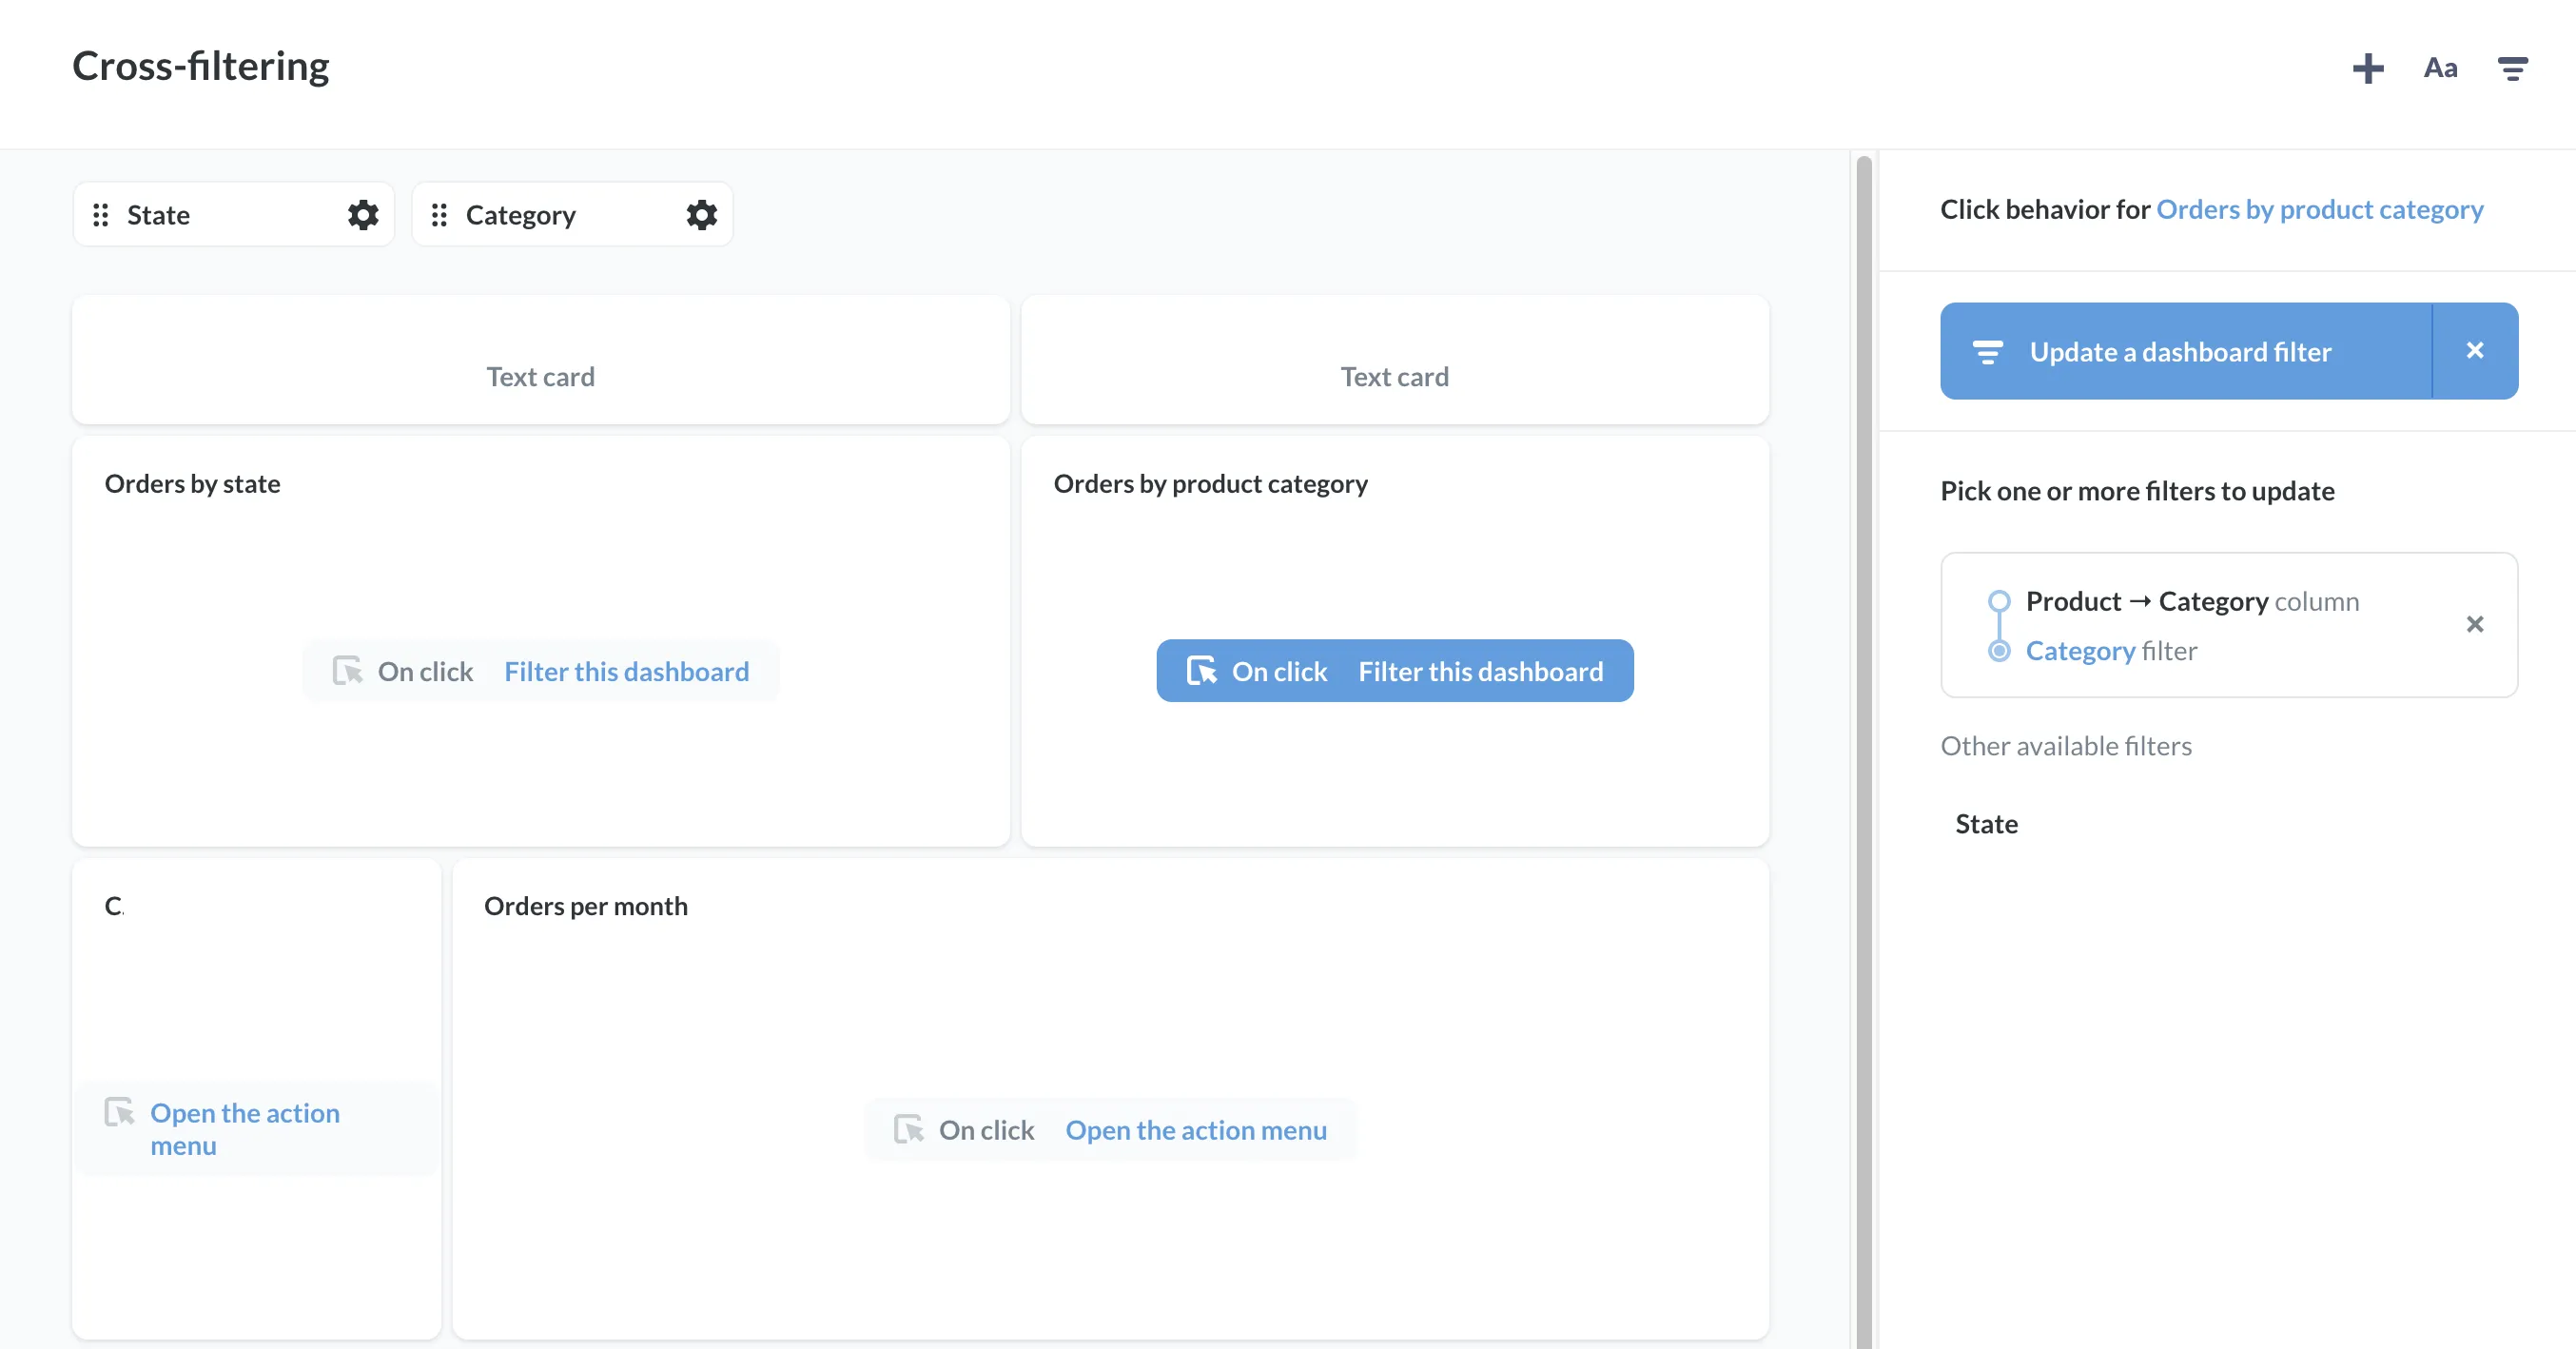
With that, Creator will give us a summary of the click behavior we just defined. In this case, we’ve set up the Orders by State card to update the State filter by passing the value User-State to the filter.
Let’s save our changes, and try out the new click behaviour:
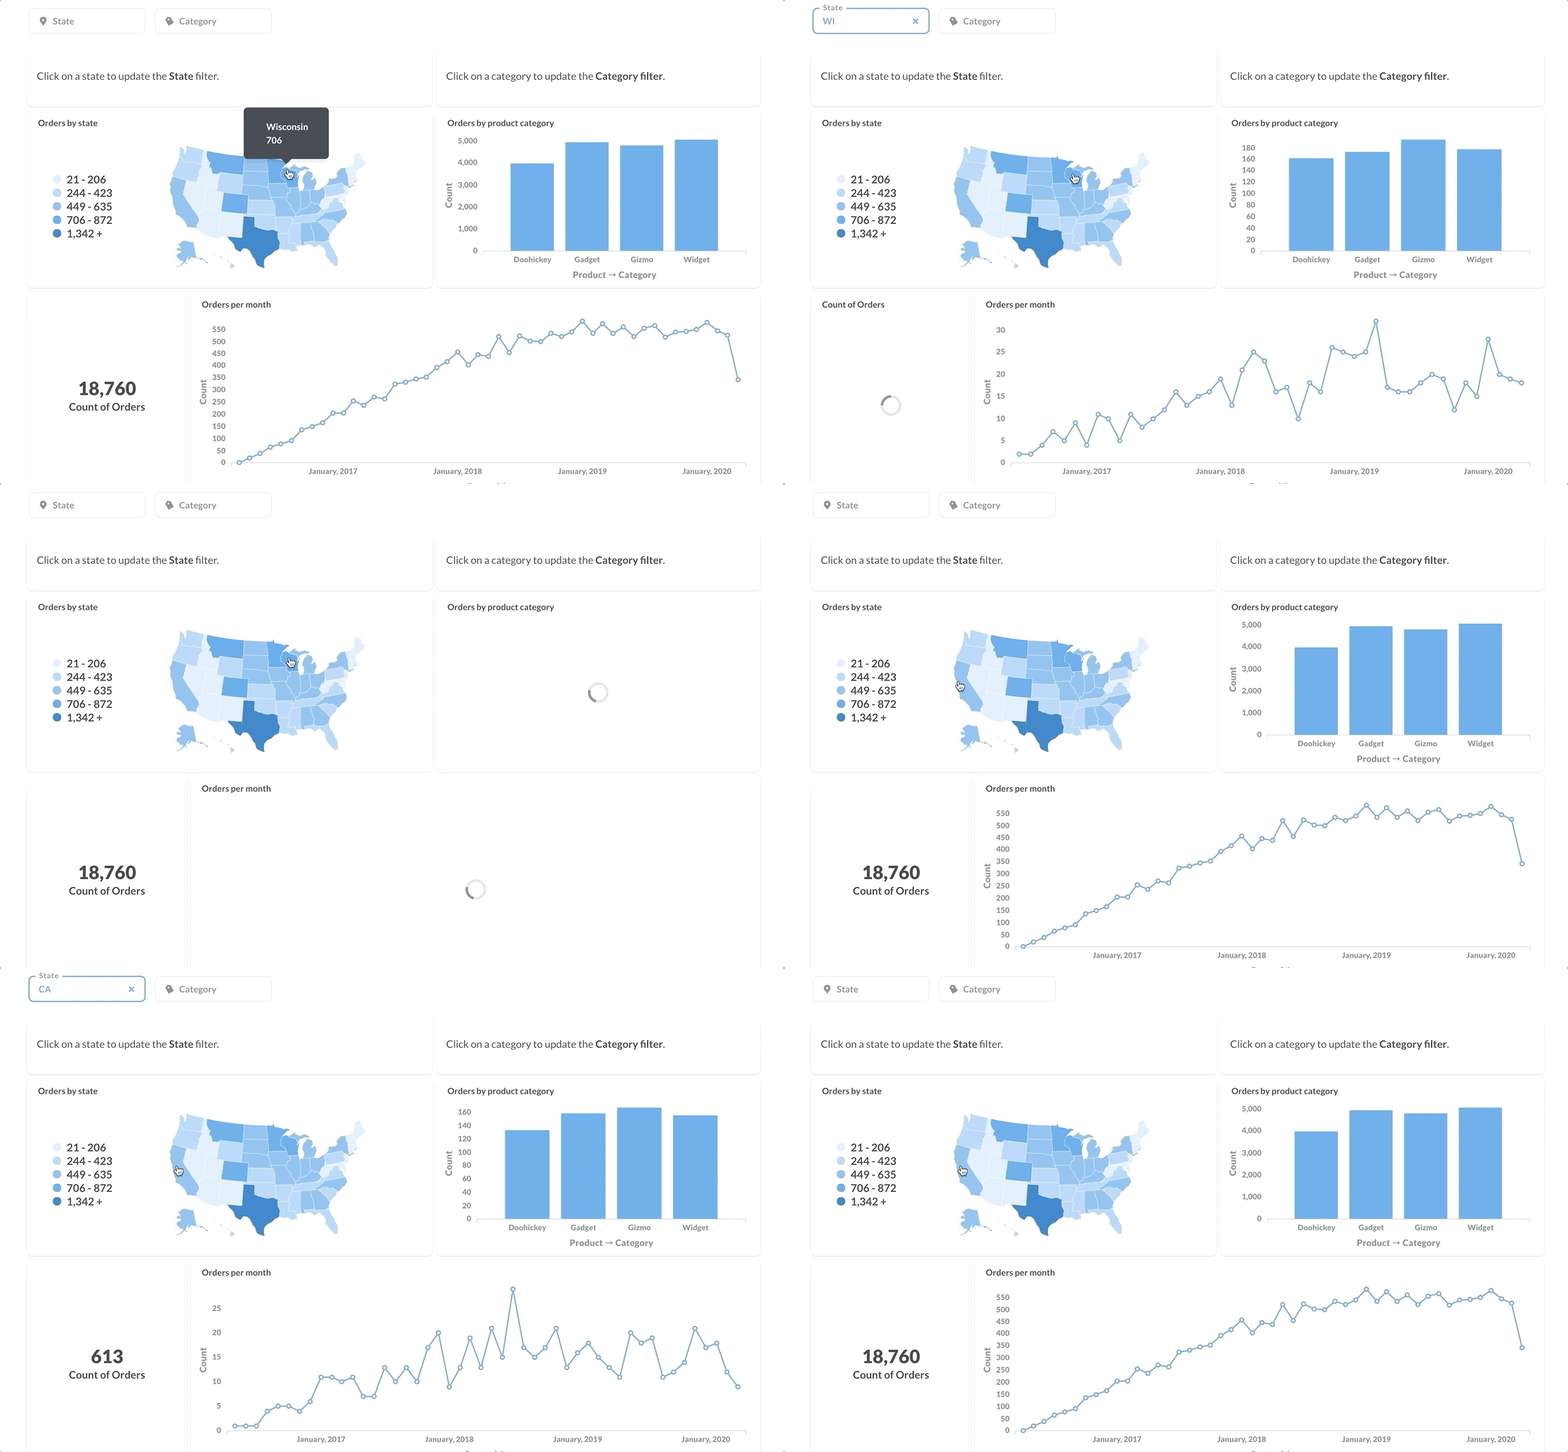
If we click on Wisconsin, the dashboard will filter the other cards for orders by users from Wisconsin. If we click on Wisconsin again, the filter resets, and the other cards on the dashboard update to show all orders from all states.
So far so good. Now let’s move on to set up the Orders by Product Category to update the dashboard’s Category filter.
The process is more or less the same as above, so we won’t walk through it step by step. All we need to do is:
- Add a
Categoryfilter to filter the dashboard byProduct→Category. - Wire up every card except
Orders by Product Categoryto the dashboard’s category filter. - Set the click behavior on
Orders by Product Categoryto update the category filter by passing values from theProduct→Categorycolumn.
The sidebar will show a summary of our configured click behaviour:
🥳 After saving our changes, we're all finished.
🤔 Need further support?
We're ready to help anytime. Reach out at help@intellischool.co.